October 31, 2011

Doggy Halloween

Happy Halloween!  We had some Halloween fun over the weekend and my dog even got in on the occasion.  I realize that I'm one of those crazy dog people (heck, I even carved a pumpkin that looked like my dog last year) so it won't come as much of a shock to you that I dressed up my dog for Halloween.  This year I went a little extra crazy by making the costume myself.

My local dog park had a Halloween dog parade to benefit an animal charity, so I couldn’t resist dressing up my pup and my parent’s dog (they are actually brothers).

diy-dog-halloween-costumes

If I do say so myself, they are too stinking cute!  Dogs dressed as other animals are just plain funny. Who can resist a dog chicken and cow?

dog-chicken-cow-halloween-costume
I got the chicken costume idea on Pinterest from (human) kid's chicken costumes and figured I could make it work for a dog too.

dog-chicken-costume

dog-chicken-halloween-costume

And a cow just seems like the perfect compliment to a chicken.

dog-cow-costume

It's not easy making a chicken and a cow sit still at a dog park full of other crazy looking pups.

diy-halloween-costume-for-dogs

Curious in how I made these dog costumes?  They were actually pretty easy and no sewing was involved.  For the dog chicken costume, first I made the base of the costume using an old white t-shirt.  I traced one of my pup's existing doggy outfits onto the t-shirt to get the right shape and size.  Then I cut out the form and hot glued the edges to get a nice clean "seam."

how-to-make-dog-halloween-costume

Then I hot glued a faux feather boa from a craft store onto the t-shirt base.  I wrapped the boa around in a U shape and just hot glued a small portion at a time onto the t-shirt.  I also hot glued a ribbon to the collar and belly areas to make ties to go around my pooch.

how-to-make-dog-chicken-costume

The headpiece was a little trickier to make.  First I cut out a white oval from felt to use as a head base and then attached the "comb" to it (I had to look up what the red thing on a chicken's head is called- apparently it is a "comb").  I traced my fingers onto a piece of red felt to get the shape down and then cut out the comb.  To make it stick up nicely, I put a small piece of cardboard from a cereal box in between two layers of felt.

make-dog-chicken-costume

Once the headpiece was done, I hot glued some ribbon to it so I could tie it around my pup's head.

The doggy cow costume was even easier to make.  I forgot to take photos as I made it, but I simply cut out a form like I did with the chicken costume using  two pieces of cow print felt and made a headpiece using a piece of cow print fleece and white fleece for the horns.

cow-costume-fabric

We met lots of other crazy dog owners at the dog park party so at least I'm not the only wackadoo out there.  Does anyone else dress their pets up for Halloween?  How about you non-pet people, how are you celebrating Halloween?

October 29, 2011

Fall Door Pocket: Rhoda's unFootball Sunday

I’m posting the (un)Football party a day early today because Saturdays are not immune to football and today is college football game day for many of you. To take a break from all of the macho madness, I’m very excited to have Rhoda from Southern Hospitality guest posting today! 

Rhoda’s blog is one of the first home decorating blogs I started reading when I stumbled onto her laundry room makeover while doing a Google search years ago.  I didn’t even know that laundry rooms could be so pretty and fancy until I saw hers!  Boy am I glad I found her blog because she is a decorating pro and her blog is full of good ideas and inspiration!  I am so thrilled to have Rhoda here today and I’ll turn it over to her now:

unfootball
--------------------------------------------------------------------

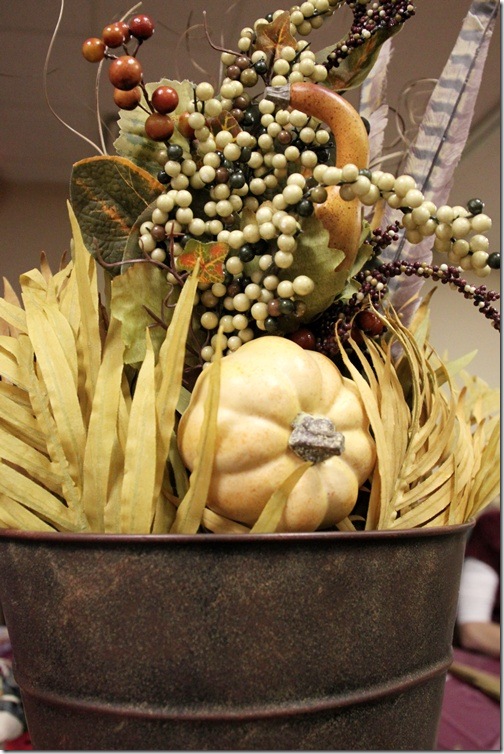
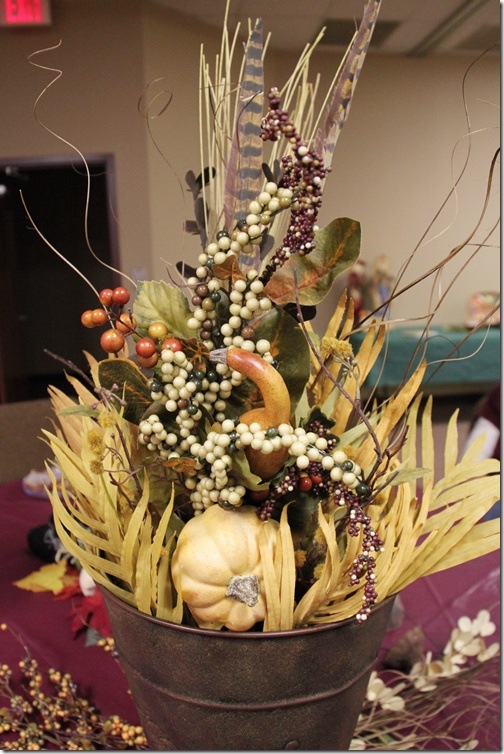
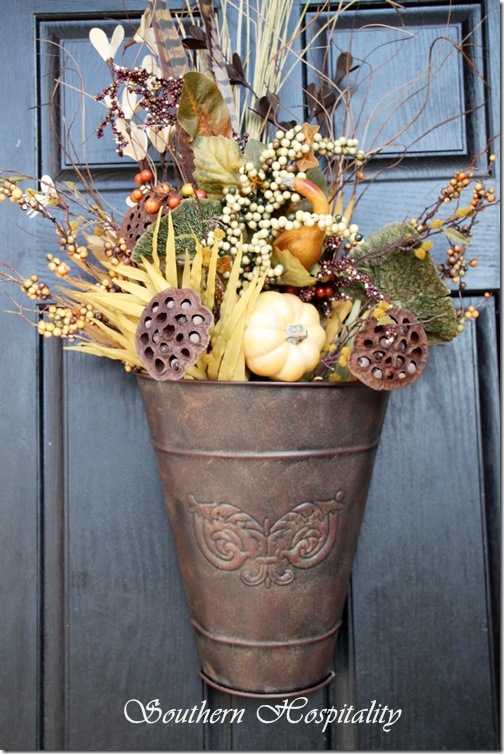
Today, I’m sharing how I made a Fall door pocket for my sister’s front door. It’s really just a matter of collecting a few Fall items from the craft store and putting them all together. I’m definitely not a floral expert, but I think anyone can put together a pleasing door arrangement with a few faux floral picks from the local store. We got all of ours at Hobby Lobby (on sale, of course!). I prefer florals that at least have a somewhat real look to them, so we opted for golden fronds and some natural elements to round out our arrangement.

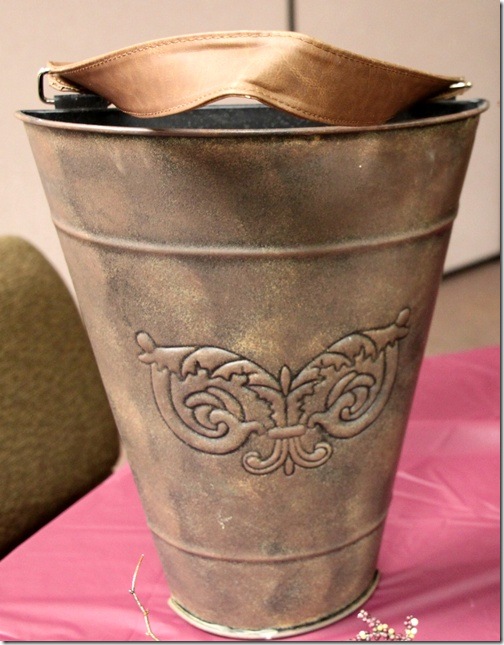
Biltmore Inspirations door pocket

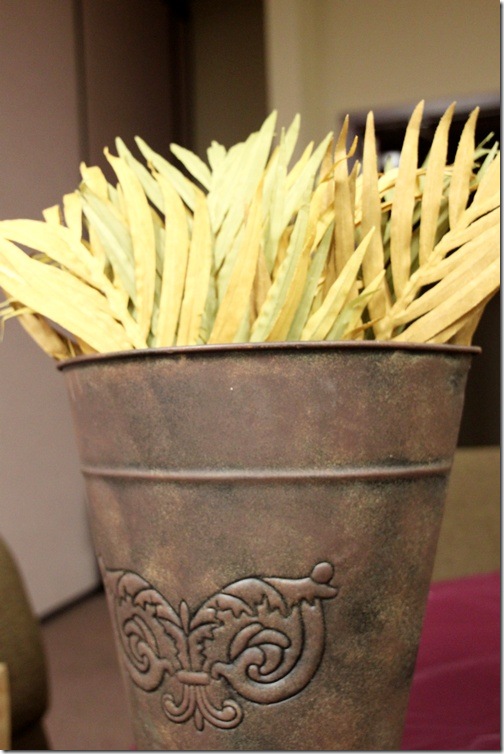
I started with the Biltmore Inspirations metal vintage grape bucket and it is a wonderful way to change out your front door look. Change it up with the seasons!

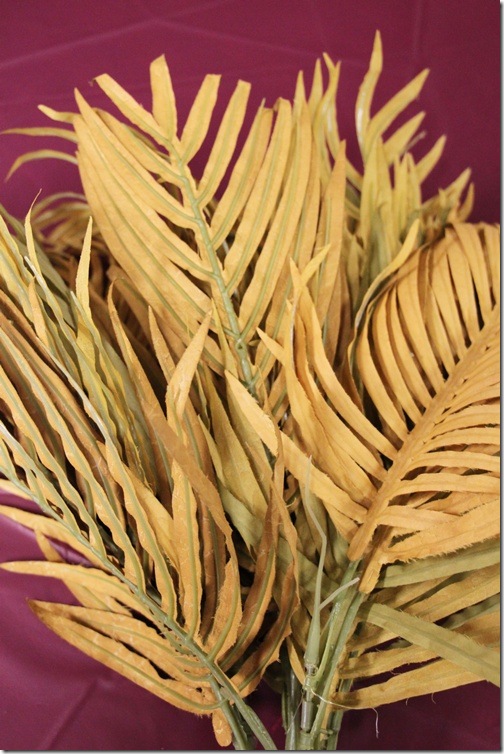
Fall florals

Here are the golden fronds which have a nice Fall color. Fake of course.

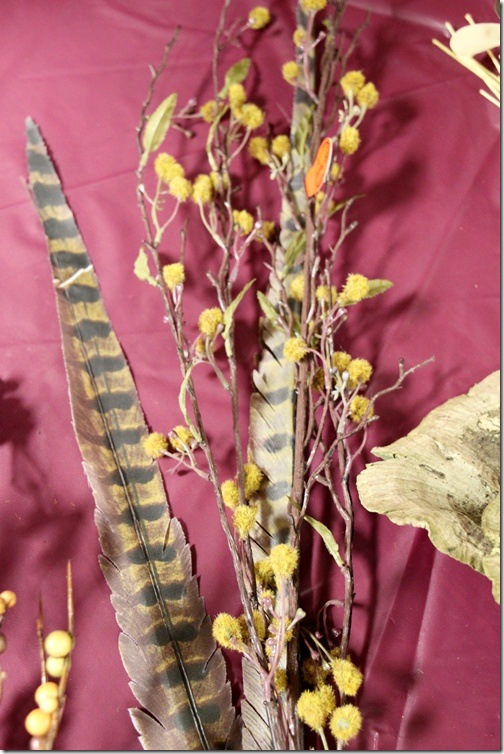
Fall berries feathers

We picked up some Fallish feathers and some fuzzy fillers too.


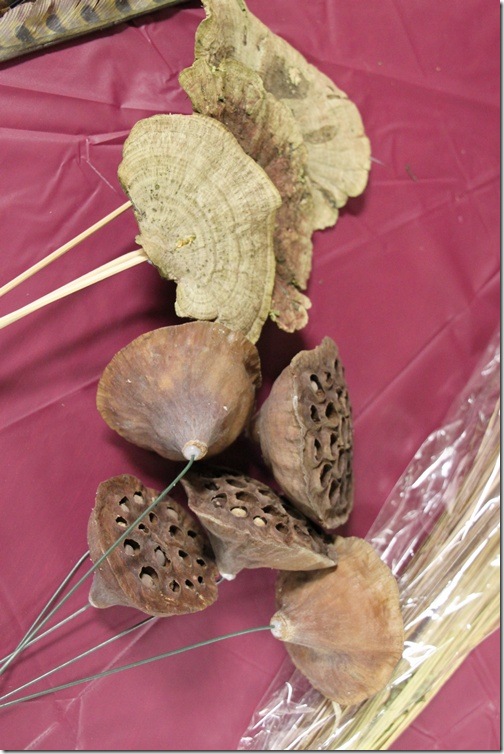
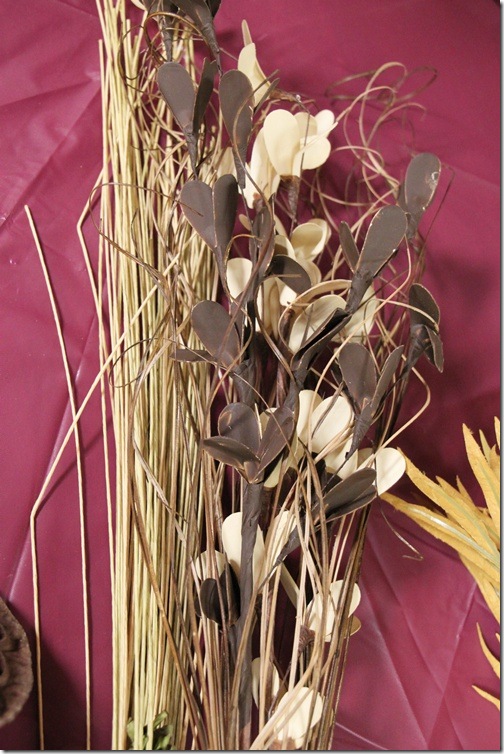
From the naturals area, seed pods, grass and mushrooms. I love all of these!
 

More grass and naturals for height.


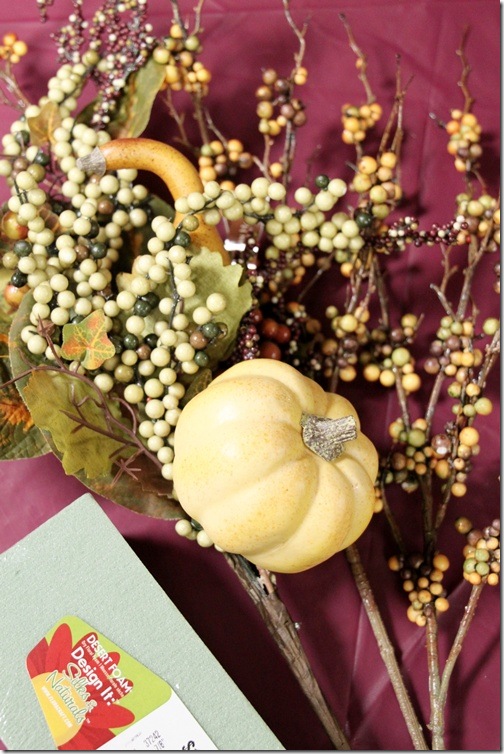
One of these picks is enough for the front of the basket, with a cute little pumpkin and berries already attached.


Start with the yellow fronds.


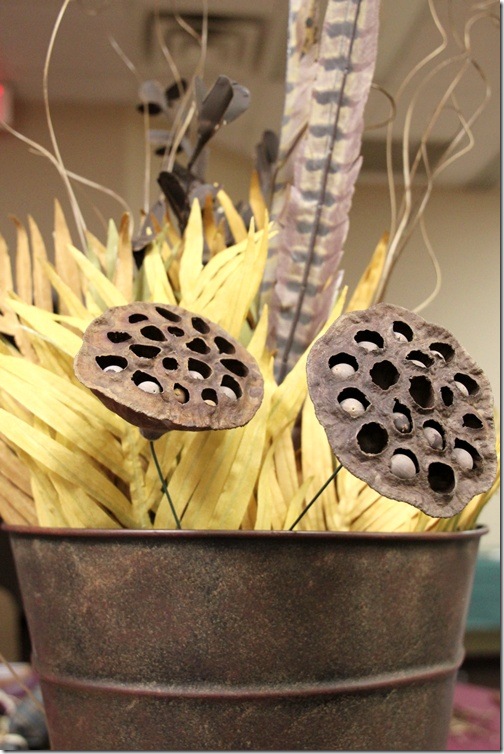
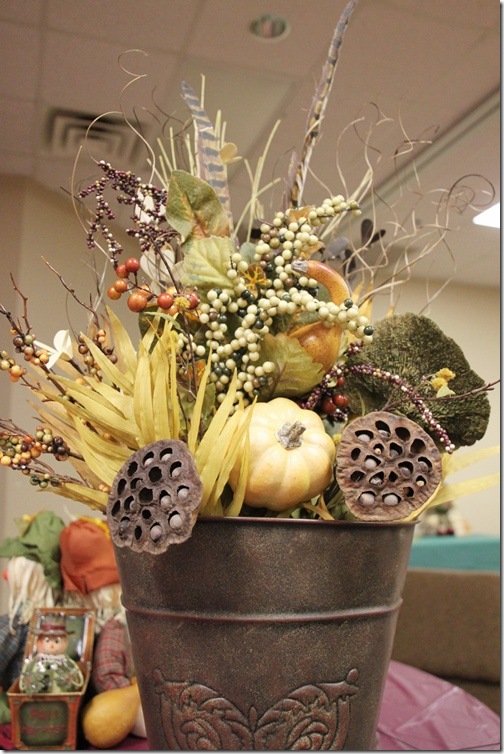
Add some seed pods and the feathers.


Plop in the large pumpkin pick and start filling in the back with the taller things.


And it all starts looking pretty.


Take a look at both sides and while they don’t have to look exactly the same, it’s nice to have them balanced.

Fall Floral Wall Pocket

Play around with it until it looks good to your eye and there you have it! You can move things around if it’s not looking good. All it takes is a few tweaks. A Fall door pocket. It’s nothing too fancy, but a nice way to greet guests. She can keep this up all the way til December and then she may opt for a Christmas look. Do you make door arrangements each season?
The Big Salad Recipe

I’ve been eating a lot of salads lately and wanted to share my big salad recipe.  It’s not just a regular salad, it’s a BIG salad.
(Click over to my blog if you can't see the video above).

Okay, you shouldn’t get that worked up about, but it is a pretty tasty salad.  And I have a secret ingredient:

grilled-vegetables

Grilled vegetables.  I use my good ‘ol George Forman to grill mushrooms and onions, giving them a nice caramelized flavor.  Since I like sweet onions, especially caramelized ones, I use both red and vidalia onions.

While I’m grilling my veggies, I also hard boil some eggs.  For a big bowl of salad, I add about 4 hard boiled eggs.

Then once the mushrooms and onions are grilled, I toss them into a bowl along with the eggs and whatever other vegetables I have on hand.  Today I added broccoli and half of an avocado, but I sometimes also add bell peppers and sliced carrots.

salad-ingredients

To make it a real BIG salad, I also add pasta.  I do about a quarter of a box of 100% whole wheat pasta and a quarter box of Ronzoni Garden Delight pasta which is flavored with veggies.  The veggie pasta adds a nice flavor to the healthy, but sometimes bland, whole wheat stuff.  A tip is to start cooking the whole wheat pasta a few minutes before you add in the white/veggie pasta since the whole wheat kind takes longer to cook.  I forgot this today and ended up with undercooked whole wheat and overcooked veggie pasta.  It doesn't just even out as I had hoped.

After all of the good salad stuff is in, I add the leafy salad part.  I used both a garden salad and spring mix since I had both on hand and I’m crazy like that.  I save the greens for the end of the salad because otherwise I end up with way too much of the grassy stuff and not enough of the veggies/eggs/pasta.

party-pasta-salad

I finish up by mixing everything together and tossing it with a light salad dressing (usually olive oil, balsamic vinegar, and salt) and sprinkling some low fat shredded cheese on top.


pasta-salad

So that’s my BIG salad.  Just make sure you get a proper thank you when you serve it to your friends.

October 26, 2011

Not So Spooky Halloween Decor

We’ve been getting in the Halloween spirit around here with some not-too-spooky décor.  I didn’t go crazy with a bunch of decorations this year, but I did add a few Halloween decorations to my front porch and entryway area.
Outside of the house, I added a few Halloween touches to the front door area.
halloween-front-door
I skipped carving pumpkins this year and instead opted for a faux jack-o-lantern bought a few years ago at Walmart.  It looks cute next to my newly painted red urns (although the mums are starting to look sad).
fake-pumpkin
A cutesy spider hung from an outdoor light greets guests:
welcome-spider
And a friendly skeleton (a 25 cent garage sale find) welcomes trick-or-treaters.
skeleton
I also opted for a chalk doormat again (you can read about my first one here):
chalk-halloween-welcome-mat
Inside of the house, visitors may be spooked by a ghost hanging from the ceiling.
halloween-door
halloween-ghost
Our entryway has a few Halloween touches too:
halloween-entryway
Like a creepy spider waiting by the doorknob:
spider-door-knob
A Halloween ready witch hanging from a coat hook:
witch-sign
And a sneaky skeleton on our console table:
skeleton-table
Last year, I went a little cobweb crazy in our dining room and previous year the entryway table got cobwebbed.  How are you decorating for Halloween this year?

This post is shared on the DIY Showoff.

October 23, 2011

Candy Corn Pumpkin: Kim’s unFootball Sunday

Welcome again to (un)Football Sunday! If you've missed the last few weeks, you can read all about (un)Football Sundays here and catch up on the previous projects (Traci's split pea pumpkins and Alissa's fall mantle).

Today, I'm very excited to have Kim from NewlyWoodwards guest posting! Don't worry Kim, we don't mind that you're actually a football fan, I'm just happy to have you here! Kim has some great DIY projects on her blog and I am majorly jealous of her sewing skills, but I'm most amazed by the top to bottom renovation she and her hubby just completed on her new home!

But today, Kim is here to share a very cute candy corn pumpkin, so I'll let her take it away:

unfootball
----------------------------------------------------------

Hi I'm Kim from NewlyWoodwards, and I'm thrilled to be hanging out at DIY Newlyweds today. Jenny and I share a love for all things pretty, renovation and DIY.


I know that the context of Jenny's unFootball Sunday party is to get away from the television on days when football dominates the living room. In truth, I'm actually a huge Chicago Bears fan and usually find my Sundays in front of the television with my husband cheering my favorite team. (Shh.... don't tell Jenny. She may kick me out of this party.) I've even braved the subzero weather to watch them in person. That's die-hard.


But, I was excited to take an opportunity to take on a fall project for the sake of unFootball Sundays. Since moving into our new house in September, I've been more focused on unpacking boxes and getting settled than decorating for fall. Now is the time! So, a few Sundays ago, I set to the task. My inspiration.


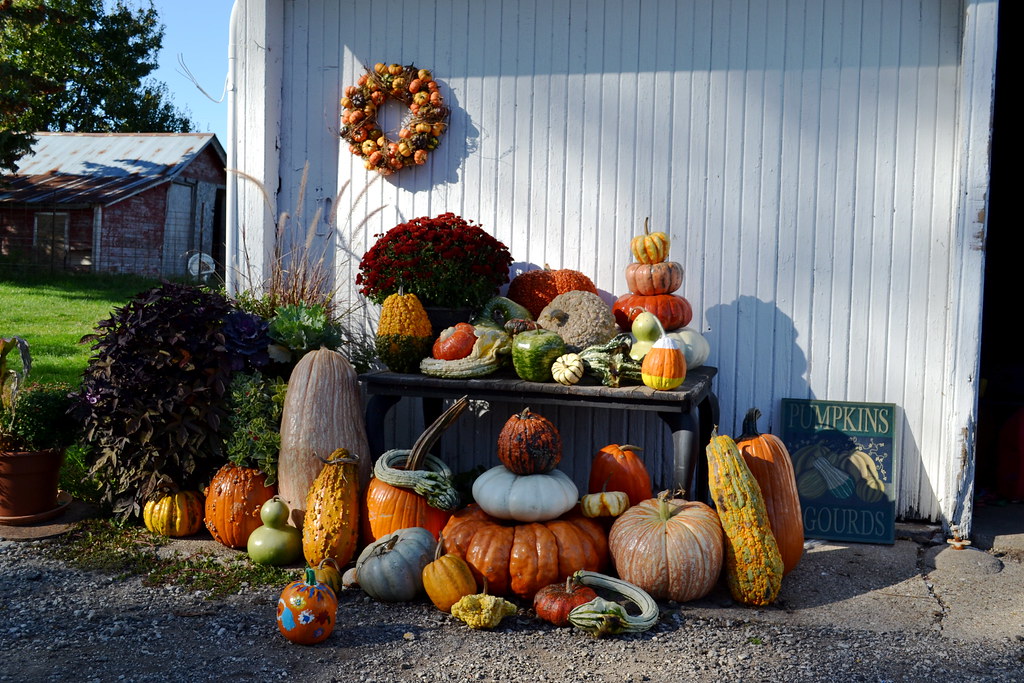
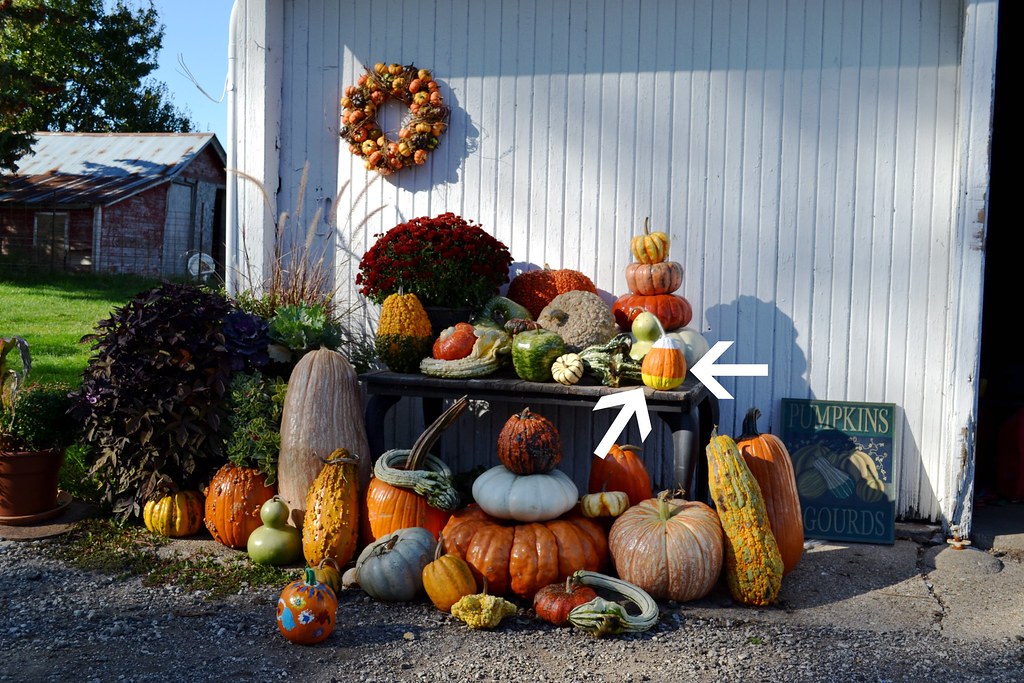
I know. There is a LOT of inspiration in this photo. This is a picture from the pumpkin patch where I picked up pumpkins. I know. I'm loving all the colors, the topiary, the wreath. (And I may have spent a small fortune to bring some of these pumpkins home for our porch.) But, I zoomed in on that candy corn pumpkin.


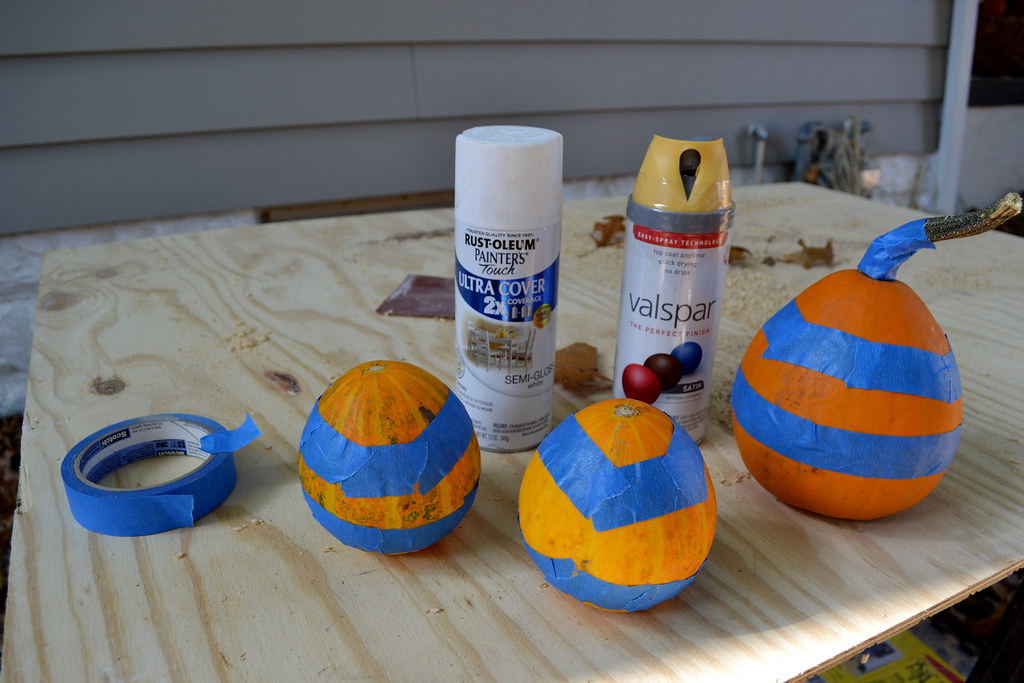
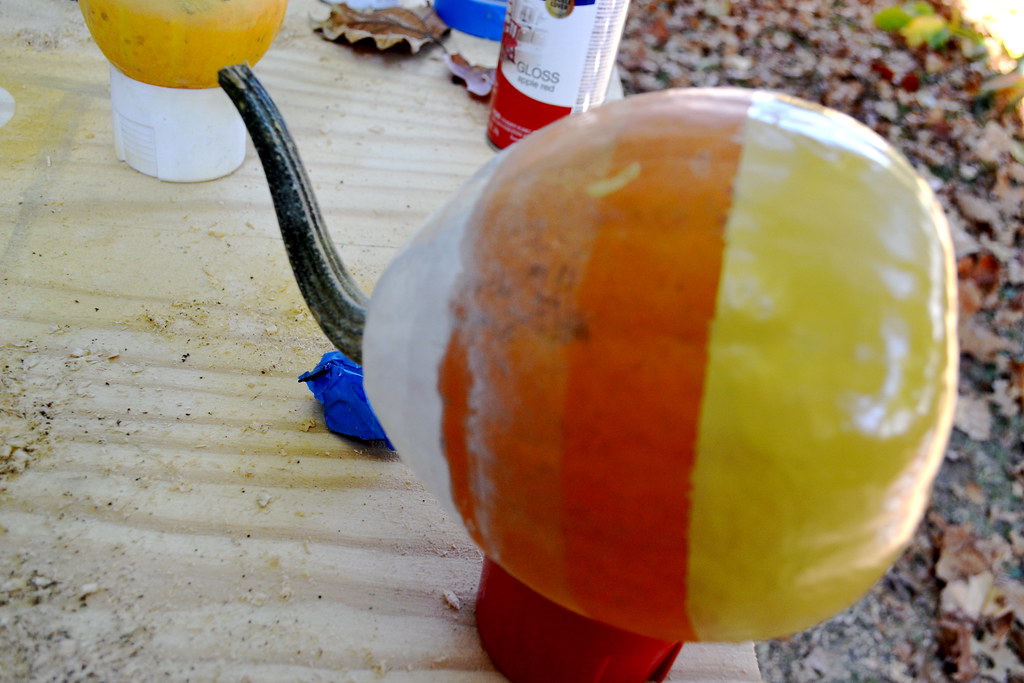
Is that not the CUTEST thing ever? I decided I must make myself a candy corn pumpkin or two while my husband was parked in front of Sunday football. It's so simple, I finished it over the course of a few downs. (Ryan was yelling the score out the window while I painted.) All you'll need - pumpkins, painter's tape, white and yellow spray paint. I had everything on-hand from other projects. (I have a mini spray paint store in the house.) I tried to find my most cone-shaped pumpkins. Luckily, I had about 45 pumpkins to choose from. Tape off the pumpkins first.


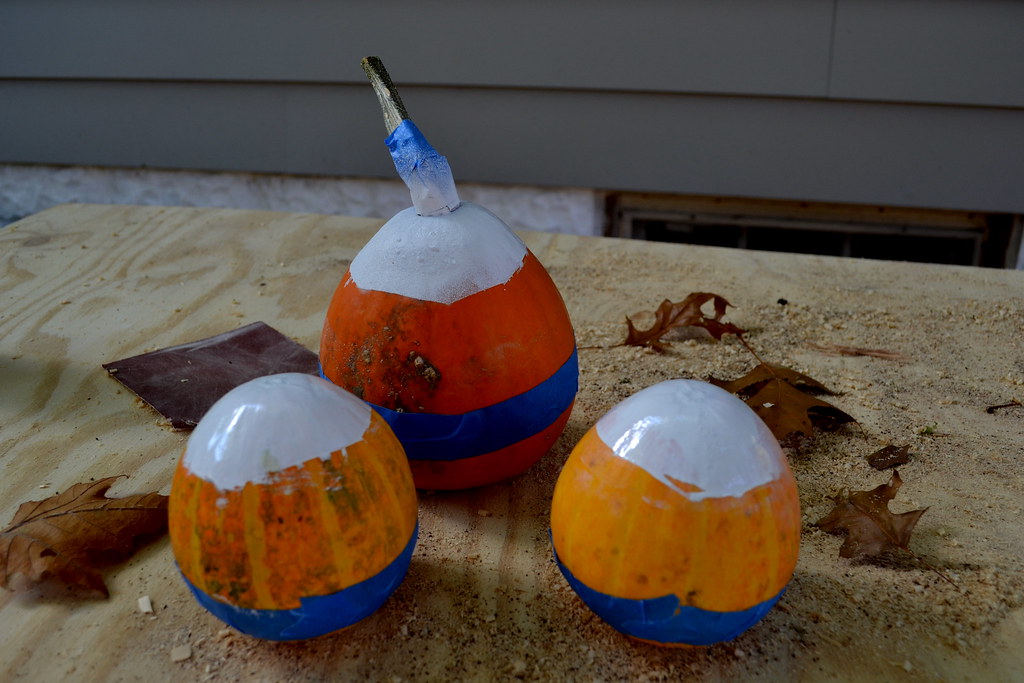
Spray white on the top first. I found it works best to take off the tape almost immediately after spraying. The lines aren't perfect, which I'm okay with. I did try to clean them up a little, but I also call it character.


After drying, spray with yellow on the bottom. Same process.


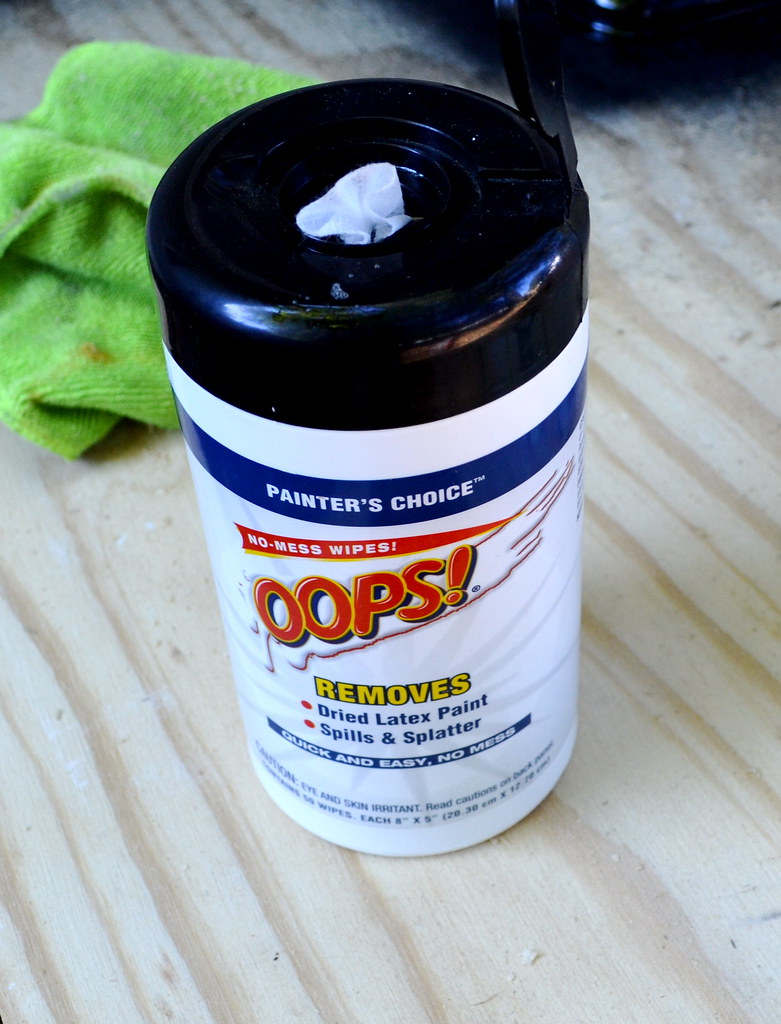
If you have any overspray that's bugging you, use my secret weapon. (Which also works pretty darn well when you spill a can of paint on newly-refinished hardwood floors. Hypothetically.)


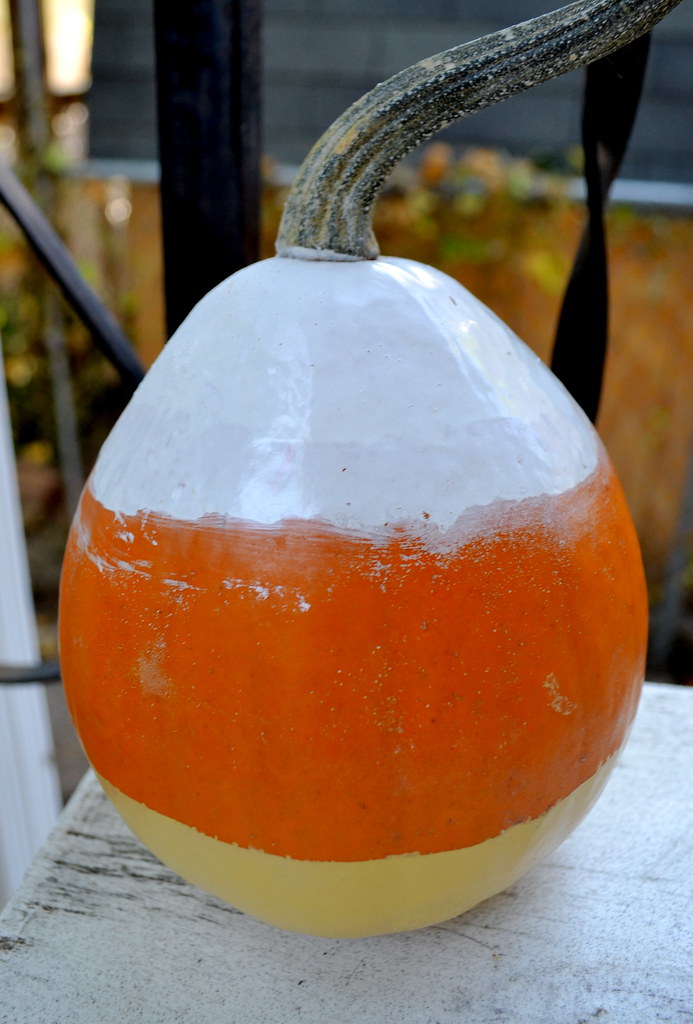
And with that, you have a candy corn pumpkin. With plenty of time to catch the remainder of the game. Or, if it's more your style, start another project.


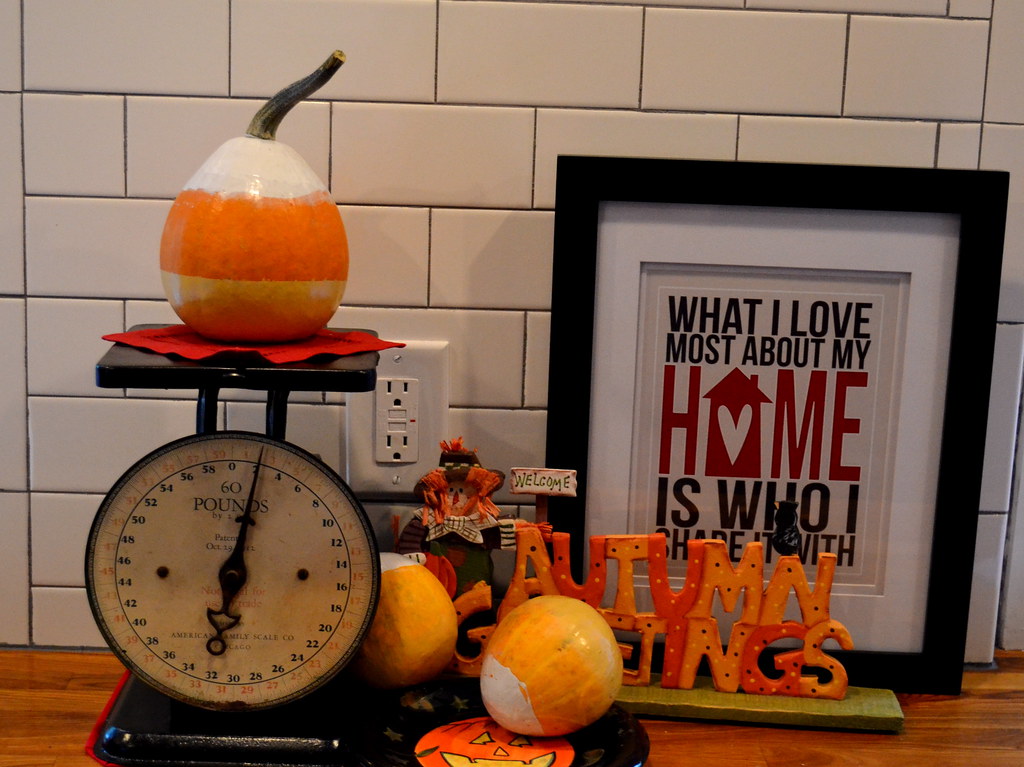
Easy, right? And here are my newest pumpkins showing off in the kitchen. (Check out our full kitchen here.)


While I was spray painting, I also sprayed that scale I found at the antique store. It's perfect, right? Thanks for having me, Jenny. And if you want to check in on what we are up to over at NewlyWoodwards, stop over anytime!

October 21, 2011

Regal Red Shell

I love decorating with shells, but they aren’t too fitting for the Fall considering that I live an hour away from the closest beach.  Yet, I like to keep some beachy touches around year-round because they remind me of warm, happy, summer times.  So I decided to Fall-ify a shell so it could be beachy, but still a little autumn-y.

sea-shell

Plus, I had been itching to use the Rustoleum “regal red” spray paint again since I really loved how it looked on my outdoor planters.  So I gave the shell a crisp red coat of paint and I love how it turned out.

spray-painted-shell

painted-sea-shell

It’s still beachy, but I like the pop of fall color.

shell-centerpiece
I love how the shell turned out and want to try spray painting different shaped shells in more colors. What do you think?