

---------------------------------
Happy (un)Football Sunday!!! Woohoo! I am so happy to be here at Jenny’s fabulous blog! My name is Traci, and I blog at Beneath My Heart.

I am the only girl living in a household full of boys, so to say that I get ESPN overload would be an understatement!

So I am very happy to hang out with you ladies today while our men are in the “zone”. Today, I am going to show you a super, super easy fall craft.
I got this idea from my friend, Julie. She decorated some pumpkins and candles for the Ladies Fall Retreat at our church, and I fell in love with them. She used split peas and lentils. Here is a picture I took at the retreat…

I started my project with some pumpkins, white spray paint, and a bag of split peas. (Please ignore the two candles in the picture below, I ended up not using them for this project.)

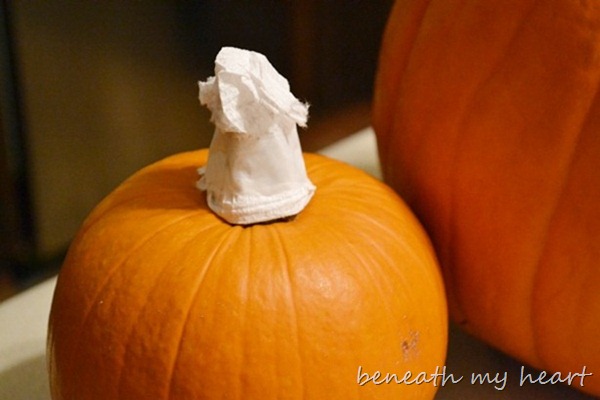
I covered the stems of the pumpkins up with some paper towel and tape.
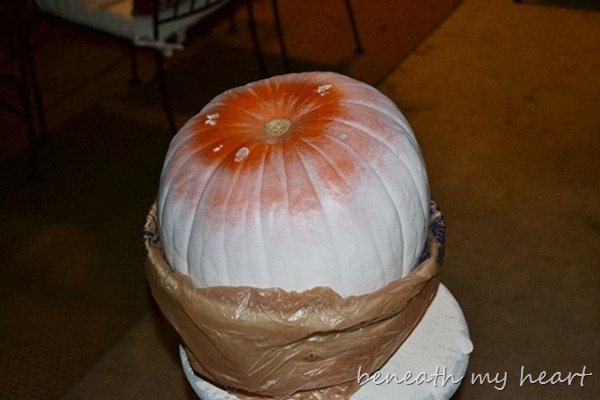
Then I sprayed those babies outside late at night! To spray paint the bottom, I waited for the top of the pumpkin to dry and then I turned it over and placed it in bowl covered in a plastic bag.
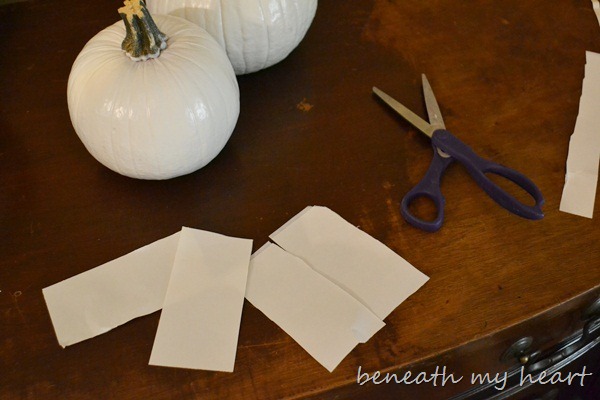
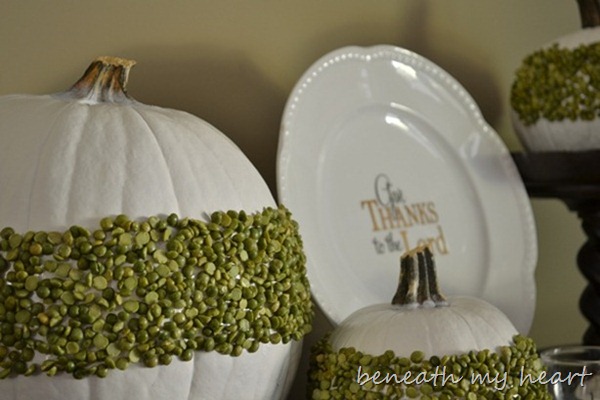
The next step in decorating my pumpkin was to apply the split peas. I bought some double stick adhesive paper from Michael’s (in the scrapbooking section).
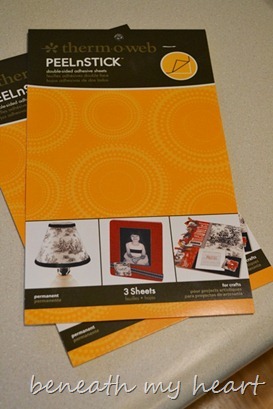
I cut the paper in strips to attach to the pumpkin.
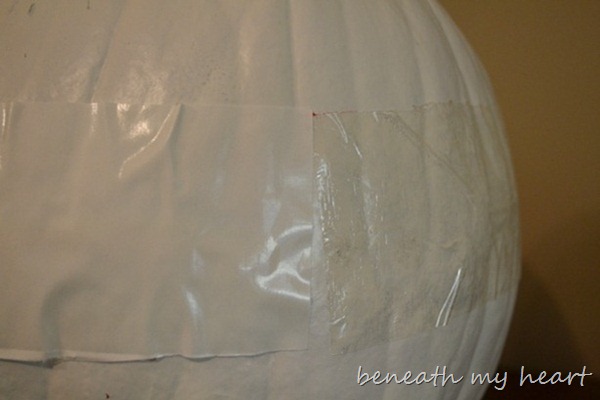
In the picture below, you can see how the adhesive sheet sticks to the pumpkin. On the left of the picture is what it looks like when you first apply it. The right side of the picture shows the adhesive once I removed the white paper.
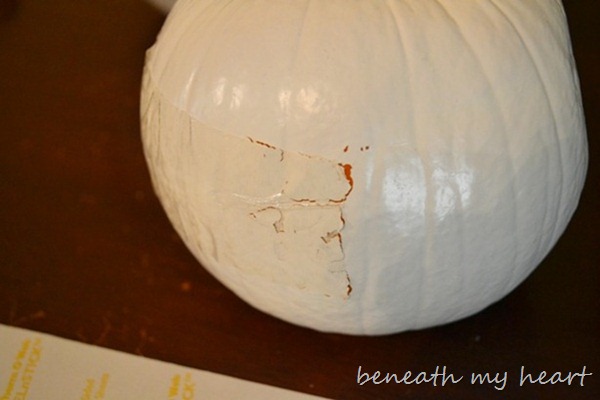
In some spots, the adhesive pulled some of the paint off of the pumpkin, but I didn’t worry about it. Once the peas were added, you did not see it a bit!
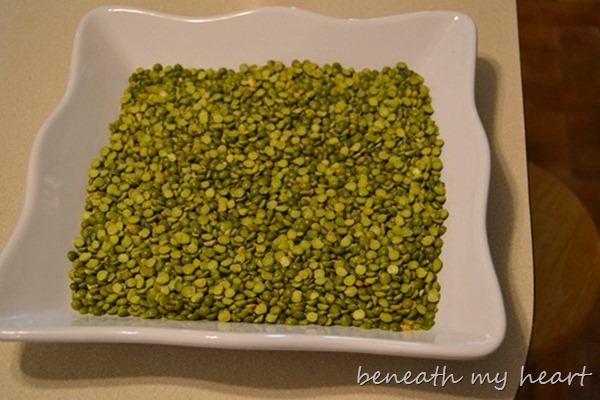
I poured my bag of split peas into a dish and then rolled my pumpkin in them. The split peas adhered very easily to the pumpkin. If there were any bare spots on my pumpkin, I would just scoop up some peas in my hand and press them on the adhesive.
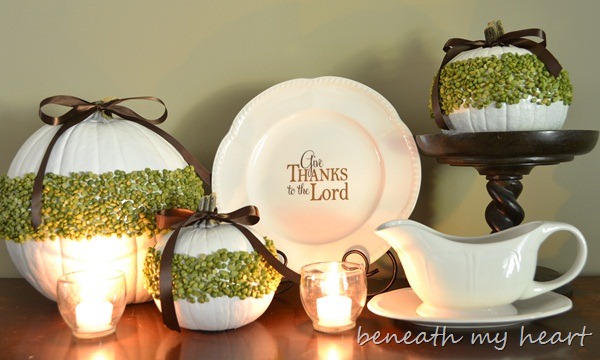
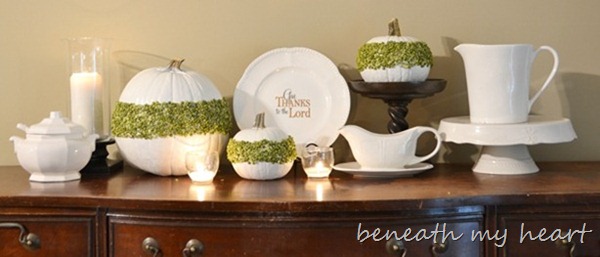
I had some brown ribbon, so I added some bows to the tops of the pumpkins. I love the dark brown of the ribbons with the green of the split peas.
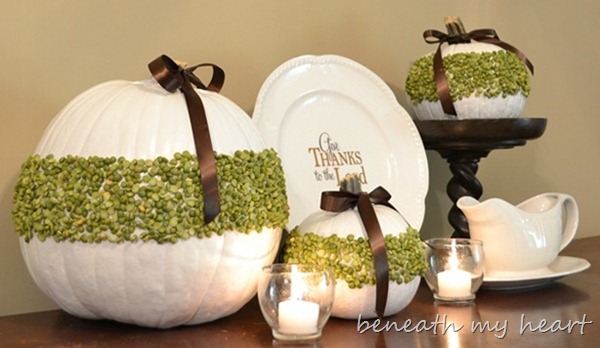
I had a “Give Thanks to the Lord” vinyl decal from Leen the Graphics Queen that I hadn’t used yet, and I thought it would look good in this vignette. So I applied it to a white plate and placed it behind my pumpkins. If you would like to order this vinyl for only $5.00, you can purchase it HERE.
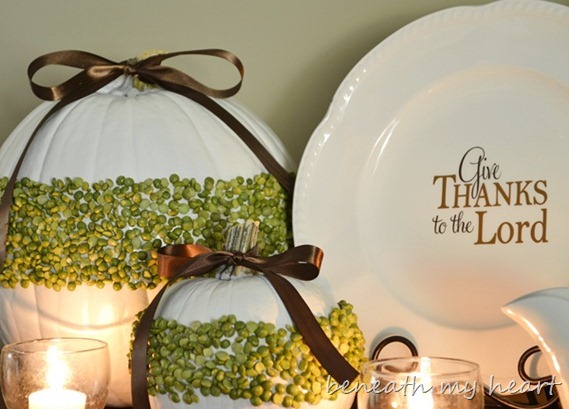
I decided to take some pictures without the ribbons…
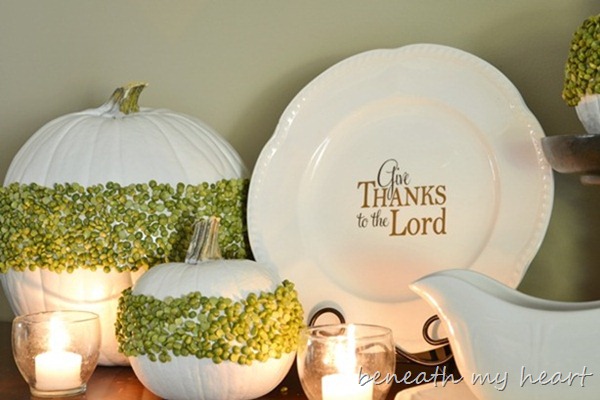
I love how natural and simple this vignette is.

And I am in love with split peas now!
I gathered up some more white things for my vignette to fill up the space on my buffet.
I’m thinking I could leave this up through Thanksgiving, don’t you? I told you this project was super easy! You could definitely complete this project in less time than it would take for your hubby to watch that football game. {wink} Thank you, Jenny, for letting me share this project with your readers! Please feel free to come visit me sometime!

5 comments:
Fun project! I've never used adhesive strips like that before. Looks like I need to plan a trip to Michael's!
I love the texture and the color of the split peas and such a smart idea using the adhesive paper. Cute, cute!
I've never even heard of these adhesive strips! That alone will help me tremendously. Love the idea of using something you may already have in your kitchen for decor. The pumpkins are too cute and totally fall appropriate.
I hadn't heard of the adhesive strips either. They are very clever! I love the way these pumpkins turned out. Traci's vignette looks so elegant!
Very pretty!
Post a Comment