
A few wonderful blogs (Young House Love, Bower Power, Emily Henderson, & Making a House a Home) issued a Pinterest challenge last week. The challenge was quite simple: actually MAKE something you've pinned! I'm guilty of pinning lots of beautiful inspirations but never bringing them to life, so I was excited to join the challenge!
If you're not familiar with Pinterst, it's essentially a virtual bulletin board where you can save photos you find online and browse what other users are "pinning." It's awesome, easy to use, and a great source of inspiration! You need an invite from another member to join, so feel free to email me and I'll send one to you.
For the challenge, I decided to replicate this map photo frame that I pinned months ago. You may even recognize it from a previous post of my favorite map inspired projects.

Before I jump into the tutorial, here's a peek at my version of this project:

It's a photo of Bermuda, framed in a map of Bermuda! Ahhh, I love the concept!
Here's how I did it. To make the matting, I started with an empty granola bar box to use as my base for the matting. Then using PowerPoint, I drew the shape of my photo and the outside matting. After playing around with rulers, levels, fractions, and division, I realized it was a lot easier to draw a 5"x7" box and 4"x5" box in PowerPoint than by hand!

Then I spray glued my box template onto the cardboard and cut out the interior rectangle using an exacto knife. To make things easier, first glue then cut.

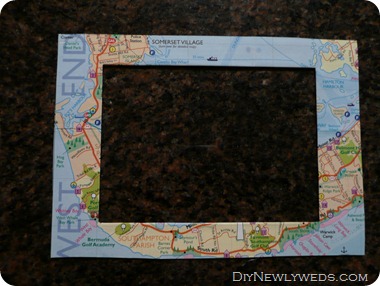
Then it was time to glue the map to the matting. I played around with the map until I found the perfect portion of it to use in my frame. This map had points of interest called out in text boxes, so I wanted to avoid them for this project.

Once I got the position just right, I made a slight crease around the matting so I knew where I'd need to glue. I turned the map over and spray glued the cardboard to the back of the map.
To cut out the inside, I cut diagonal lines in the inside rectangle:

And folded over the cut flaps to create a smooth finish for the inside of the matting.
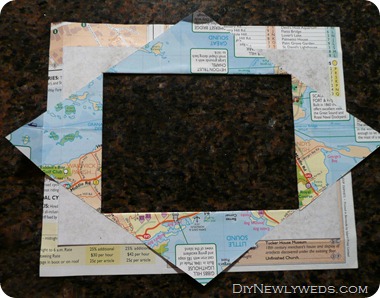
After trimming excess, I got a pretty cool looking map mat!
First I placed it in a black frame, but I wasn't crazy about how that looked, so I spray painted the frame white.

Next time, I might make the matting a little thicker to show off more of the map. I have yet to hang this frame up, but I have a special place in mind for it (it's actually another project I'm working on based on more inspiration I found on Pinterest so stay tuned! Update: check out my travel gallery wall!)

I'm happy to have finally made something off of Pinterest! I'm loving this map photo frame and it's a great reminder of our Bermuda vacation. Have you brought any of your "pins" to life?
8 comments:
I love map inspired projects. Looks great.
I love this and have it pinned on Pinterest too! Great tutorial!
Too funny that you just left a comment. I was JUST admiring your map frame! I love it!
This is awesome! Love it love it love it!
Thanks for your nice comment! I love this project, too! I think I have it pinned as well. You did such a great job, and what a fun and beautiful memento!
Nice! I love the matting tutorial piece, that Pin is another one on my to do list!
Wonderful re-make! I have also pinned that map idea and have yet to make one-thanks for the wonderful tutorial!
Thanks for linking up-one thing-I was tired last night and forgot to add the rules/button code-could you come back and grab the code (if I put it here it reads it as HTML and just shows the button) to put on your post? Thanks I'd really appreciate it!
-Kristi
@ Creative Kristi
Such a great idea. Had to share it with my readers. Keep up the good work.
Post a Comment